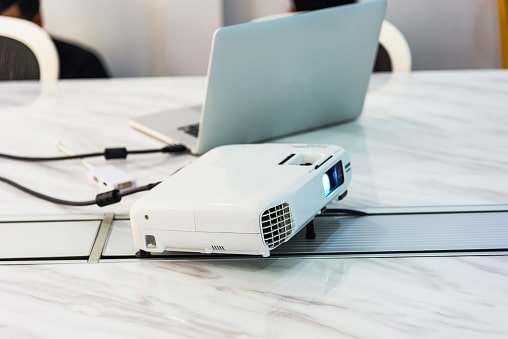
Projectors are great tools for presentations or classroom lectures. They allow you to project images onto a large screen, allowing you to share information in a way that would otherwise be impossible.
However, connecting a projector to a computer isn’t always straightforward. There are several ways to connect them, depending on the projector you have. The common way to connect the, both is using an HDMI cable. It is because most modern laptops support this connection method.
This article will discuss How to connect projector to a laptop screen using VGA or HDMI port and even wirelessly.
Table of Contents
Steps to Connect VGA projector to a VGA laptop:
If your projector and laptop comes with VGA ports, here is how to connect them:
- Plug in the power chord of projector and the laptop
- Now, Turn on the projector only.
- Locate the VGA ports on the computer and projector to insert the VGA cable.
- Make sure that the settings on the projector and laptop are in sync to display the images.
- Go to your Desktop – Click on Right button – Select Screen Resolution – Choose the option ‘Duplicate’
- Adjust the focus and size of projection using a small wheel on the projector or using a remote control.
- As VGA ports are meant to transfer the video’s only, you need a separate cable to transfer the audio of your laptop to your projector
However, you won’t get the same quality as with an HDMI connection if you do so. You will also need to buy an HDMI adapter to convert the signal from VGA to HDMI.
Why Use HDMI?
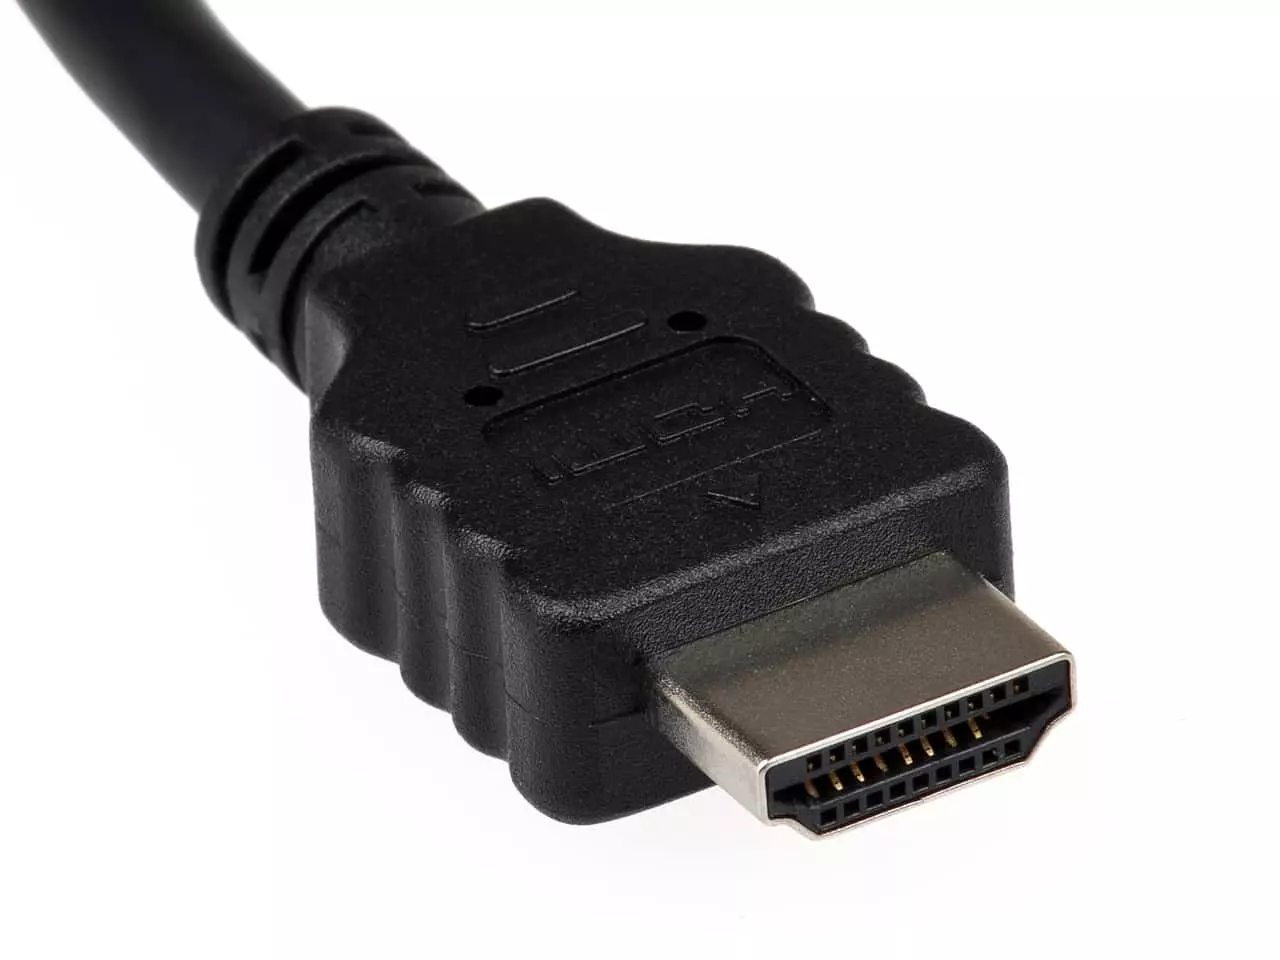
HDMI stands for High-Definition Multimedia Interface. It was developed by Intel and Microsoft and allowed high-quality video and audio signals to be transmitted between different devices. The reason why it’s used over VGA because it supports higher resolutions (1920 x 1080) and better color reproduction.
As both audio and video travel through the same channel, using HDMI. It also helps in cutting down the usage of different cables.
Most laptops, projectors, and consoles come with an HDMI connection. Also, the HDMI cables are available in different sizes.
How to Connect a Projector to a Laptop With HDMI?
Here are the steps to connect a projector to a laptop with HDMI:
Step Get the Right Cables.
A lot of people use HDMI cables to connect their laptops to projectors. You should check the placement of your laptop before buying a new cable and make sure the cord doesn’t interfere with anything else. It is worth noting that most of today’s laptop models, including Chromebooks, come with a dedicated HDMI port.
Depending on the distance between the laptop and projector, you can determine the length of your HDMI cable. Always consider buying a cable bigger than the distance measured between the two.
Plug-in Your Laptop
Laptops use a lot of energy to play movies on them. Hence, some laptops have a built-in feature of preventing content flow to HDMI when the battery is low. When plugged in, you’ll notice more speed and better image quality. If you do not plug in, battery life will be shorter, but you won’t have any issues playing videos. Hence, keep the power cord handy.
We recommend you plug in your laptop once you connect the projector to prevent any delays to videos.
Connecting the Projector to The Laptop
To connect the projector to the laptop, check out the ports of the respective devices. There would be multiple ports on both devices. Make sure to choose the HDMI port, which is not shared with any other connection.
Connecting the HDMI ports of the laptop and projector using an HDMI cable will transmit the audio and video together without any interruptions (provided your projector has an inbuilt speaker).
Turn on Your Laptop.
Once connected, make sure the laptop is turned off. Then turn on the projector and wait until the power indicator lights up. You may experience some delay while the projector boots up. To avoid this, we suggest you keep the laptop ‘on’ for at least 10 minutes after turning it on. This way, the projector will boot up faster.
Now, Press Window Key + P, and select the Duplicate Option
Check the Settings on Your Laptop
You may also require to adjust some settings on your laptop. These include brightness, contrast, volume, and resolution. To do so, open up the Settings menu and select Display. Adjust these settings according to what you see on the projector.
You can now start watching videos on the projector.
Factors to Consider While Connecting Your Projector With a Laptop Using HDMI Cable:
In case you are facing some issues with the projection of images/videos, here are some best troubleshooting tips that can get you an easy fix:
Is the HDMI Cable Plugged Correctly?
If the HDMI cable is set loose on either end ( at projector side or laptop side), there will not be any image projection. Also, check if you have enabled the setting in the laptop to send the content through HDMI.
If Both The Devices Recognize the New Connection?
Although most of the devices recognize the new connections, there might be some issues when connecting your laptop and projector for the first time. We recommend you to turn off both laptop and projector in place. Now, reboot the projector first, followed by the computer, and resolve the issue. If not, check out the following possible reason as below.
Is Your HDMI Cable Backward Compatible?
Reusing an old HDMI cable with a newer device often causes hustles in projection. Suppose you find the projected picture quality pixelated, any audio loss, or any other intermittent connection issues. In that case, it is time to upgrade your HDMI cable with a new one.
What About Wireless?
Projectors with wireless capabilities can be pricey, but wired connections aren’t always practical. It is particularly true if your projector is hung on your ceiling. You can convert any projector with an HDMI connection into a wireless projector with the help of a Wi-Fi connection.
How to Connect The Wireless Projector With Your Laptop?
To connect the projector wirelessly, follow the steps mentioned below:
Step 1 – Find the USB port in your projector and insert the wireless dongle in it.
Step 2: Press the input button manually or use the remote control on the projector. Select the ‘multimedia’ option from the menu and select it by pressing the ‘Enter’ key.
Step 3: Now, Choose Laptop/Desktop from the multimedia option.
Step 4 – Select the “Connect to Other Network” option from the list
Step 5 – Now, turn on the Wi-Fi on your desktop or pc screen and look for the projector’s name listed in the Wi-Fi available network list.
Step 6 – Now select the projector and enter the password
Step 7 – Open the web browser on your laptop and add the IP address.
Step 8: Install the application on the system by selecting the Wi-Fi option appearing on the laptop’s left.
Step 9: Now open the installed application and enter the control code shown in the web browser at the bottom right side of your laptop.
Step 10: The connection between projector and laptop will establish in some time.
Step 11: Now, you can access the media files on your laptop using a projector.
Conclusion
Connecting your laptop and projector is easy when you know the proper procedure to follow. As most new devices come with an HDMI slot, it is easy to connect them by following the steps above. However, if you face any problems while doing so, you can also refer to the manuals for detailed information for a specific model of projector or laptop.

Hi! I am Allan Turner, writer for projectorpick.com. My love for Home theatre inspired me to pen down this blog to share my years of experience in projectors. I am a movie buff and always fascinated with the projectors in cinema halls. This inclined me to explore more about the world of projectors and pen down my observations through this blog.