Are you looking for ways to enjoy movies outside without having to spend too much money? If yes, then you should definitely check out our article on How To DIY Outdoor Movie Theatre?
| A Quick Fact:
Movie theatres are great places to watch a movie, but they can also be expensive. The average ticket price is $9.16, and some even charge over $12 per person. That’s why you might want to consider watching movies outdoors instead. |
You don’t necessarily need to build a full-fledged outdoor theater to enjoy movies outside. To being with, you need is a projector screen and projector.
In this article, we’ll show you how to build a basic outdoor cinema using selective materials.
Yes! It is easy to build your outdoor movie theatre with this quick guide
Things You Need to Build a DIY Outdoor Movie Theatre:
Here are the essential things you need to arrange before you begin your project of making a DIY outdoor Movie theatre:
1. A Projector
The first and the foremost thing that you require to set up an outdoor home theatre is a reliable outdoor projector. A projector with 3000 minimum lumens count is considered best for outdoor projection.
If you specifically want to use the projector for daytime, consider buying a minimum of 5000-lumen projectors to combat the ambient daylight.
Can I Consider Using My TV Over Projector?
Although it is also possible to take your TV outside to watch movies the only constraint is the screen size. You will not be able to enjoy a drive-in theatre-like experience even with the largest available TV Screen.
On the other hand, Modern home theater projectors provide excellent picture quality and a brighter image than expected. If you choose a projector with a lesser lumen count, they are still good to go for night movie watching.
From the most affordable choices like Projectors with Wifi, you can go for many high-end projectors such as LG PF50KA.
Our complete buying guide will help you find the best projectors with 4000 lumens to enjoy your favorite movies in the winter sunshine.
If you consider some cheaper options, always mind the lumens count. Remember, most of the budgeted projectors under $200 come with a lower lumen count.
2. Projector Screen
While different types of screens are available in the market, there are several projector screen DIY that helps you to create one for yourself. Projecting an image on a bare wall may not lead to a quality projection.
Hence, if you are on a tight budget, you may consider a sheet or a projector paint. A large white sheet is another cost-efficient DIY projector screen that you can consider for your DIY Home theatre. Your screen will move if there is even a slight breeze. This will ruin your overall experience.
Why Consider an Investment in a Quality Projector Screen?
You can get the best experience by investing in a quality projector screen. Portable, retractable and inflatable are some of the outdoor screen options that are strictly counted as outdoor projector screens.
Hence, an actual screen will give you the best results with any projector. Check out our guide to the best outdoor projector screen to pick the best screens. If you are a DIY enthusiast, check out our guide on How to DIY Outdoor Projector Screen to save some bucks.
3. A Media Player
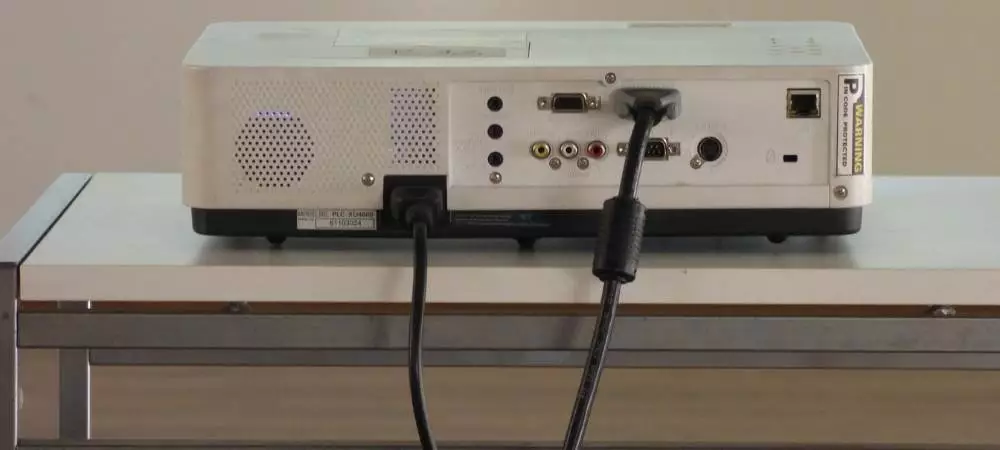
A media player is a handy device that is used to display video by connecting with a projector using HDMI. There are no projectors that are capable of displaying the video files directly from the USB port.
To run the video files, you essentially need a media player. Options such as iPad or laptop can be used but there is no competition to a compact media player. Connecting the Blu-ray player or DVD player is a conventional way of playing movies.
If your projector is powered with a USB connection, streaming sticks are capable of drawing power from the USB connection. In case you don’t have a streaming stick, you can consider using a laptop to output a video signal via HDMI. Other options such as a wireless connection, wireless HDMI transmitter, or an HDMI cable from the computer to the projector are also considered to play videos.
If you want to avoid the hassle of a media player, consider a projector with inbuilt streaming apps. Such projectors only require strong wi-fi connectivity and you are good to go.
4. Better Speakers
While most of the projectors come with internal speakers they are not powerful enough to accommodate your backyard needs. On average, most of the projectors are loaded with 5W to 10W speakers that are only ideal for indoor family movie watching.
To elevate your overall outdoor movie watching, consider the powerful Bluetooth speaker. Connecting any speaker with analog input to the projector’s audio output is possible. This makes it easy to upgrade your speaker system.
This feature is available on many Bluetooth speakers and most soundbars.
You’ll need either an HTML3.5-mm-to 3.5-mm stereo cable or an audio cable to connect them.
Bluetooth is the easy way to go wireless if you need to. Many projectors have a Bluetooth connection that allows you to send audio to a better-quality Bluetooth speaker.
But connecting to a Bluetooth speaker often cause an issue of Lip-sync between the video and speaker. You can connect it to a streaming device if you have a Bluetooth speaker.
This connection can be made via Roku’s mobile app. However, it is a complicated process and technical knowledge. The Roku app is connected to the Roku stick. This is as simple as connecting on the same Wi-Fi network.
The Bluetooth speaker is then connected to your tablet or phone. Your phone will then send the audio stream to the Bluetooth speaker. You can also connect to an Amazon Fire TV Stick using. To do this, go to the main menu and select the settings.
A Bluetooth transmitter is another wireless option if you don’t have an Amazon stick or Roku but still want to use Bluetooth-enabled source devices such as a laptop.
These devices can connect to the source’s audio output and wirelessly send it to your Bluetooth speaker. It works just like Bluetooth built-in.
5. Other Accessories
You will need these essential components to create a magnificient outdoor cinema experience. You might need a few more things, depending on the size of your yard and house.
Extension Cords
Extension cords will be essential to your project. Many cords come with multiple outlets at one end. This allows you to run only one cable and plug in many devices. A power strip is also available.
Home Wi-Fi
Your home’s Wi-Fi network might need some help if you are trying to stream video outside and your signal strength or stability is not good enough. Before purchasing an extender and a new router, ensure your home network runs as fast as possible.
Mosquito Repellant
As outdoors are prone to biting insects and mosquitoes, they shouldn’t ruin your fun times. We have various options for the best mosquito-control gear, including fans and sprays.
Quick Process Of Setting up The Movie Theater < 1 hour
Here are the steps that help you in setting up a DIY outdoor movie theatre quickly yet perfectly:
1. Choose a Location
You can set up a projector screen in the front yard using a stand, in your backyard or even on any exterior wall, depending upon the space available. It can also be put up as a portable screen on your drive away, between the two trees or against your garage door, if you don’t have enough space in your backyard.
2. Get Ready For the Sound System
If you don’t have speakers, you can purchase portable speakers to fill your outdoor space with sound. Harman Kardon offers many great options.
3. Get Ready to Stream
If your projector doesn’t have a stand, you’ll need to prop it up on a small table or stool.
Other Things to Make Your Outdoor Movie Theater Experience Commendable:
To take your Outdoor home theatre experience next level, here are the two essential aspects that you should pay attention to:
1. Snacks & Drinks
Snack food should be more casual. To avoid making a mess, use cups and bowls whenever possible. Focus on easy-to-eat foods without using too much silverware or getting too dirty.
Popcorn is a favorite movie snack! For larger groups, consider an outdoor beverage dispenser.
2. Outdoor Seating
All the technical aspects are in place! Now it’s time to think about the people. It would help if you decided where everyone would sit. Smaller groups can use a few blankets. Larger groups might require folding chairs.
Pro Tips For Seating Arrangements:
- Always arrange the seating plan in parity with the projection screen. The movie view should be clear for all the seats.
- House lights must be switched off.
- Make sure to add extra cushions and blankets for outdoor comfort and to use materials that can get wet or dirty.
- A set of outdoor folding chairs is a good option.
- Give your outdoor theater a vintage camp feel with Pendleton blankets for a retro look.
- Bring out the wine chillers, snacks, and hurricane candles for a romantic atmosphere.
- String lights can also be hung from trees or pagodas.
- You can bring non-waterproof decorations inside after the movie ends to protect yourself from rain.
Conclusion
Your DIY outdoor movie theater project is almost done! Turning your backyard into a magical movie theater takes some effort but it is worth investing.
Making a DIY Outdoor Movie theatre is a fun and affordable way to organize a movie feast for friends and family. All you need is to gather the required stuff, and you are good to go!

Hi Guys! My name is Mark and I am editor for Projectorpick.com. My extensive experience of over 30 years in Home theatre has paved my way as a senior editor for Projectorpick.com. My vision is to empower people with the right set of knowledge in home theatres that helps with right purchases.